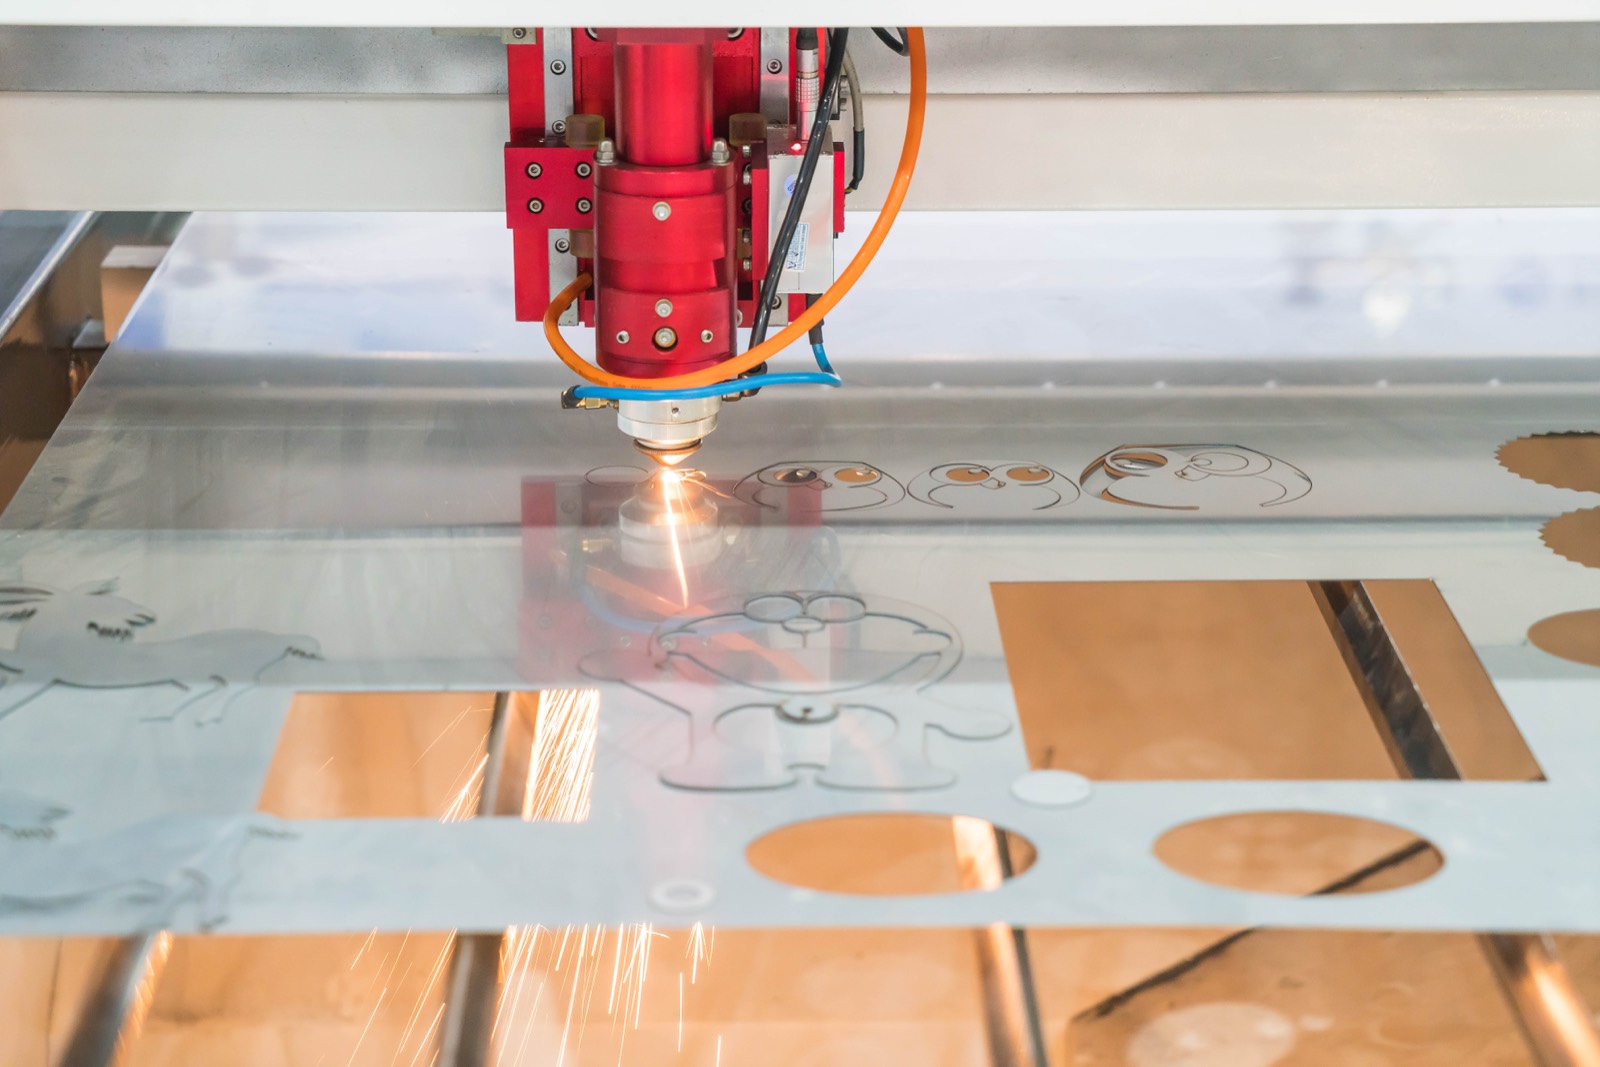
Why Vector Quality Matters for CNC & Laser Cutting
CNC routers, laser cutters, and vinyl plotters don't interpret images — they follow paths. Every line, curve, and contour in your vector file becomes a physical instruction for a blade, laser beam, or spinning bit. If those paths contain gaps, excess anchor points, or overlapping segments, the machine produces rough edges, incomplete cuts, or outright failures.
This guide explains the two most critical requirements for cutting-ready vector files: closed paths and minimal nodes. Whether you're cutting signage from wood, fabricating metal parts, or producing vinyl decals, these principles determine the difference between a clean cut and a costly mistake.
Closed Paths: The Non-Negotiable Rule for Cutting
A closed path is a vector shape where the start point and end point meet — forming a complete, unbroken outline. Think of it as a cookie cutter: the blade must travel all the way around and return to where it started, or the shape won't separate from the material.
Closed Path (Correct)
- Start and end points are joined
- Machine knows what to cut out
- Shape falls cleanly from material
- CAM software can calculate offsets
Open Path (Problem)
- Gap between start and end points
- Machine stops mid-cut or skips
- Piece stays attached — requires manual break
- CAM software may throw errors or crash
How Open Paths Happen
Open paths usually creep into files during auto-tracing, careless editing, or format conversion. Common causes include:
- Auto-trace artifacts: AI vectorizers often leave tiny gaps (less than 0.1 mm) that look closed on screen but aren't.
- Compound paths broken apart: Ungrouping or expanding complex shapes can disconnect sub-paths.
- Text not converted to outlines: Live text isn't a cut path — it must be converted using "Create Outlines" first.
- Format conversion loss: Saving AI → SVG → DXF can break joined paths if handled improperly.
How to check
In Adobe Illustrator, go to View → Outline mode (Ctrl/Cmd + Y) and look for any gaps. You can also select all paths and check the Attributes panel — open paths show a different icon than closed paths. In Inkscape, use Extensions → Visualize Path → Measure Path to identify unclosed segments.
Minimal Nodes: Why Fewer Anchor Points = Smoother Cuts
Every anchor point (node) in a vector path is a coordinate the cutting machine must process. More nodes don't mean more detail — they mean more direction changes, micro-stutters, and rough edges. A smooth curve needs far fewer nodes than most people think.
What Excess Nodes Do to Your Cuts
Rough, Bumpy Edges
Too many nodes create tiny facets instead of smooth curves. On wood, this means visible ridges. On metal, burrs that need sanding. On vinyl, edges that peel.
Machine Stutter & Burn Marks
Laser cutters slow down at each anchor point to change direction. Hundreds of unnecessary nodes means the laser pauses repeatedly, scorching wood or over-cutting vinyl.
Slower Processing & File Bloat
DXF files with thousands of unnecessary nodes take longer to load in CAM software and increase cut time. Some machines may even refuse to process overly complex files.
CNC Tool Wear
Each direction change creates stress on CNC router bits. Excessive nodes accelerate tool wear and can cause bit breakage on hard materials like aluminum or stainless steel.
Auto-Traced Vector (Typical)
200+
anchor points per letter
- ❌ Jagged curves that look smooth zoomed out
- ❌ Redundant nodes on straight segments
- ❌ Stacked/overlapping anchor points
- ❌ Cuts have visible micro-faceting
Hand-Traced Vector (Optimized)
12–20
anchor points per letter
- ✅ True Bezier curves — perfectly smooth
- ✅ Only essential nodes retained
- ✅ Clean geometry, no stacking
- ✅ Cuts are silky smooth on any material
Rule of thumb
A well-traced circle should have exactly 4 anchor points. A simple letter like "O" needs only 8 (4 outer + 4 inner). If your auto-trace produced 50+ nodes for the same letter, it needs professional cleanup.
Material-Specific Requirements: Wood, Metal & Vinyl
Each material reacts differently to vector quality issues. Here's what you need to know:
Wood (CNC Router & Laser)
Wood is forgiving on small imperfections but punishes excessive nodes with scorching and splintering. Grain direction adds complexity — a tool that stutters across the grain will tear fibers instead of cutting them cleanly.
Key Requirements:
- Closed paths for all cut-through shapes
- Minimal nodes to prevent scorching on curves
- Minimum detail size: 1 mm for laser, 3 mm for CNC
- Tabs/bridges for parts that need to stay in place
Common Applications:
- Custom signage and lettering
- Furniture inlays and decorative panels
- Wooden toys and puzzles
- Architectural models
Pro Tip
For CNC-routed wood, add dogbone fillets at internal corners. A round bit can't cut a perfect 90° corner — the dogbone compensates so pieces fit together precisely.
Metal (Laser, Plasma & CNC)
Metal cutting demands the highest vector precision. Excess nodes cause the laser or plasma torch to hesitate, creating heat-affected zones, warping, and dross buildup. CNC milling on metal with a noisy toolpath accelerates bit wear and can snap end mills.
Key Requirements:
- Perfectly closed paths — no exceptions
- Absolute minimal nodes for smooth toolpath
- Kerf compensation accounted for in design
- DXF format preferred (native CAM compatibility)
Common Applications:
- Custom metal signs and wall art
- Precision machine parts and brackets
- Automotive and aerospace components
- Decorative metal screens and panels
Pro Tip
For plasma cutting, keep minimum feature size above the material thickness. A 3 mm thick sheet can't hold a 2 mm detail — the heat-affected zone will destroy it.
Vinyl (Plotter / Cutter)
Vinyl plotters use a tiny blade that physically drags through the material. Unlike laser and CNC, the blade has to rotate to change direction — excess nodes force the blade into rapid micro-turns, tearing the vinyl instead of cutting it cleanly. This is where node count matters most.
Key Requirements:
- Closed paths for every shape and letter
- Fewest possible nodes — critical for blade plotters
- No overlapping paths (causes double cuts)
- Minimum line width of ~1.5 mm for weeding
Common Applications:
- Vehicle wraps and fleet graphics
- Window lettering and storefront signs
- Heat transfer vinyl (HTV) for apparel
- Custom wall decals and stickers
Pro Tip
Mirror your design before cutting HTV (heat transfer vinyl). The design is cut on the backing, so it needs to be reversed. Also ensure all text is converted to outlines — your plotter software won't have your fonts installed.
Best File Formats for Cutting Machines
| Format | Best For | Closed Paths | Node Control |
|---|---|---|---|
| DXF | CNC routers, laser cutters, plasma | ✅ Preserved | ✅ Excellent |
| SVG | Vinyl plotters, laser cutters, web | ✅ Preserved | ✅ Good |
| AI | Professional design & conversion | ✅ Preserved | ✅ Excellent |
| EPS | Legacy systems, print & cut | ✅ Preserved | ⚠️ Varies |
| Universal sharing, some laser software | ⚠️ Check setup | ⚠️ May flatten |
Recommendation
For CNC and laser cutting, request your vector files in DXF + AI format. DXF is the native language of CAM software, while AI preserves the editable source. For vinyl cutting, SVG + AI is the best combination.
Auto-Trace vs. Hand-Trace: Which Produces Cut-Ready Files?
Auto-tracing tools (like Adobe's Image Trace, Potrace, or online converters.) analyze pixel data and generate vector paths automatically. They're fast and free — but the results are almost never cut-ready.
The Auto-Trace Problem for Cutting
- Hundreds of unnecessary nodes — A simple logo auto-traced can produce 2,000+ anchor points where 50 would suffice
- Open paths and micro-gaps — Paths that appear closed but have 0.01 mm gaps that confuse cutting software
- Overlapping and self-intersecting paths — Causes double cuts, wasted material, and damaged blades
- Staircase artifacts on curves — Pixel-following traces create stepped edges instead of smooth Bezier curves
Hand-Tracing: The Cut-Ready Standard
Professional hand-tracing (what VectorGurus does) means a human designer rebuilds your design from scratch using the pen tool — placing each anchor point deliberately, creating true Bezier curves, and ensuring every path is properly closed.
- 10–20x fewer nodes — Only essential anchor points, producing buttery-smooth cuts
- Guaranteed closed paths — Every shape is verified as a closed contour before delivery
- Clean geometry — No overlaps, no self-intersections, no stacked points
- Machine-ready output — Files tested for compatibility with CNC, laser, and vinyl cutting workflows
Cut-Ready Vector Checklist
Before sending any vector file to a CNC router, laser cutter, or vinyl plotter, run through this checklist:
- 1
All Paths Are Closed
Select all objects → check for open paths. In Illustrator: Object → Path → Join (Ctrl/Cmd + J) to close any open paths.
- 2
Nodes Are Minimized
Use Object → Path → Simplify in Illustrator. Target ~90% reduction for auto-traced files. Manually check curves remain smooth after simplification.
- 3
Text Converted to Outlines
Select all text → Type → Create Outlines (Ctrl/Cmd + Shift + O). This converts fonts into vector paths the machine can follow.
- 4
No Overlapping Paths
Overlapping shapes cause double-cutting. Use Pathfinder → Unite to merge overlapping shapes, or Divide to split them cleanly.
- 5
Correct Dimensions & Units
Design at 1:1 scale in inches or millimeters. Confirm with your cutting service which unit system they expect.
- 6
No Raster Elements Embedded
Remove or replace any embedded JPG/PNG images. Cutting machines ignore raster data — or worse, try to interpret it unpredictably.
- 7
Strokes Expanded
Convert all strokes to filled shapes: Object → Expand. A "stroke" is a visual style — the machine needs the actual path outline to cut.
Need Cut-Ready Vector Files?
Getting a logo or design from a JPG/PNG to a cut-ready vector isn't just "converting" — it's rebuilding. Auto-trace tools can't produce the closed, node-optimized paths that CNC routers, laser cutters, and vinyl plotters require.
What You Get from VectorGurus for Cutting Applications:
Conclusion
Cutting machines don't care how good your design looks on screen — they care about path quality. Closed paths tell the machine exactly what to cut. Minimal nodes ensure the cut is smooth and the machine runs efficiently. Whether you're cutting wood signs, fabricating metal parts, or producing vinyl decals, these two principles are non-negotiable.
If you're working with auto-traced files that keep getting rejected by your cutting service, the fix isn't a better Settings preset — it's proper hand-tracing. Have a professional rebuild your design with clean geometry, and you'll never fight with your cutting machine again.